Showing posts with label Guest Bloggers. Show all posts

Monday, December 5, 2011

Guest Blogger: Sarah Fitzpatrick

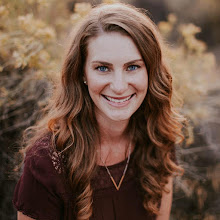
I'm so excited to introduce my friend Sarah to you!
She is funny, real and down to earth.
Her blog makes me laugh and challenges me to be more like Jesus.

She is the momma of 4 little ones and is in the process of adopting a baby to add to the bunch.
I asked Sarah if she could share some of her adoption journey with us because, well...Aaron and I have thought a lot about adoption and I know a bunch of other people who have too
but Sarah and her family
And I think that's cool. and inspiring.

Here's Sarah :)


Word is out that we are expanding the FitzFam once again!! This time by way of adoption, which is so unbelievable that we're here - doing this - for real.

Where do I begin?

After we had Addison we wanted to adopt but (BUT GOD) I found out I was pregnant with Troy. After Troy we wanted to adopt but (BUT GOD) I found out I was pregnant with Mia. This time around I've pretty much been whispering "adoption" in fear of getting pregnant again. But (BUT GOD) here we are, adopting, and I'm not pregnant.

I was all about international, really it's all I knew. My friends who've adopted have gone overseas, and I had huge fears wrapped up in doing a domestic adoption and having a birth mother to contend with. For some reason I thought for over seas adoptions - out of sight out of mind. (Clearly a naive and immature rationale.) But (BUT GOD) my mind was slowly changed and my heart grew softer and softer and all of the sudden domestic didn't seem crazy and fostering became, dare I say it?, beautiful.

Mark and I attended a meeting for people with hearts for orphan care on September 13th. (This is open to everyone! Next meeting is in January.) In the car on the way home we both said we should look into fost/adopt. Nothing magical was said at the meeting. Nothing specific happened, but (BUT GOD) at some point God spoke to both of us and confirmed this is what he wanted for us.

There have only been a few times in my walk with the Lord that I have felt I am exactly where he wants me to be, doing what he wants me to do. This is one of those times.

That night we got online and researched Olive Crest. We sent in the pre-application to find out more information and a week later received the Main Application in the mail. Two weeks after that we had our first in-home meeting that basically laid out all of the intricacies of Olive Crest fost/adopt program and we signed a commitment letter stating we are in this for realsies. They don't want to waste their time if many man hours of training and interviewing later we decide it's just not really for us.

This is really for us. For realsies.

Today we had our homestudy. It was basically a three hour marriage and family assessment. I think everyone should have a homestudy done! I love answering questions about my marriage and family! At one point - when I was struggling to find serious faults in Mark - Mark pointed out that I would've had no problem finding a plethora of faults a year ago. One year ago, in the thick of him working an insane amount of hours and me being in a new house with four very little children, we would've answered a lot of the questions very differently than we did today.

"And you were dead in the trespasses and sins in which you once walked, following the course of this world, following the prince of the power of the air, the spirit that is now at work in the sons of disobedience— among whom we all once lived in the passions of our flesh, carrying out the desires of the body and the mind, and were by nature children of wrath, like the rest of mankind. BUT GOD, being rich in mercy, because of the great love with which he loved us, even when we were dead in our trespasses, made us alive together with Christ— by grace you have been saved— and raised us up with him and seated us with him in the heavenly places in Christ Jesus, so that in the coming ages he might show the immeasurable riches of his grace in kindness toward us in Christ Jesus. For by grace you have been saved through faith. And this is not your own doing; it is the gift of God, not a result of works, so that no one may boast. For we are his workmanship, created in Christ Jesus for good works, which God prepared beforehand, that we should walk in them." Ephesians 2:1-10

But God walked through the thick of it with us. He saw us tired and weak and knew it wasn't time. Then he moved us. And he reduced our stuff and increased our trust. I looked at our kids and was filled with a lovely fullness, but God said there is room for more.

I was a sinner, blind and lost, but God said he had room for more, and adopted me.

It is our joy to love sacrificially in the name of Jesus who so greatly sacrificed for us.

What are the "But God"'s in your life?

Monday, February 21, 2011

Message Board Tutorial with guest blogger Angie

Soon after I got into the crazy world of blogging I met Angie.
I'm pretty sure I was looking up ideas for Mackenzie's quilt when I stumbled upon Angie's blog and her quilting genius.
Then I saw these adorable ABC fridge magnets she made and I knew we would be blogging friends.
She has let me pick her brain and answered my silly quilting questions and now I get to share her with you.

Meet Angie...

I am so thrilled to be over here at Lu Bird Baby today!
My name is Angie and I am from the blog This and That.
I love to keep my head spinning with ideas, projects and recipes.

Today I am going to show you how to simply transform a picture frame into a message board.

I sprayed this picture frame white a while back, as it sat behind my couch I had all sorts of ideas of what to do with it. A message board was one idea.

What I did?
I just replaced the picture that was behind the glass with a piece of ironed light colored fabric
That way you can write on the glass with white board markers and have a message board.

To make, cut the fabric about an inch longer on each side, lay in frame on top of the glass and cover with the cardboard that came with the frame. Press the little metal tabs down onto the fabric to secure in place.

And the best part about these message boards is you can switch out the fabric as often as you want. Just make sure you go with lightly colored prints or solids.

Thanks for having me Kristin!

Thanks Angie for sharing such a cute and easy project with us!
I'm sure I have an old frame or two just begging to be made into a message board :)

Monday, November 29, 2010

I'm guest blogging at Joy's Hope!

When Julie asked me to be a guest blogger on her blog I pretty much freaked out.
I big puffy heart her and her blog.
Come on over here and check it out.

Tuesday, September 15, 2009

Owl Doll Tutorial with Guest Blogger Cyndi

I'm so excited to introduce you to my amazing friend Cyndi.

Cyndi is the kind of person people want to be around.
The first time I met her I knew I wanted to be her friend.
She just has a fun, intense, honest, genuine spirit.

Plus she is amazingly talented.
She is the best cook...seriously.
She sews super cute stuff for her kiddos
and crafts things I can only dream of.
And she is a crazy talented worship leader.

Since fall is finally here
and owl's are super cool
I asked Cyndi to share her adorable owl tutorial with us.

Here it is...
Enjoy!

"So I love photo tutorials! Photo tutorials are my new favorite thing on the internet. It's amazing to me thru blogs and people's websites how much is accessible to us! So I decided I was gonna do my very own!

I have a thing for owls that started when I was 4... you say how do you know, how can you remember so far back??? Well my grandpa died when I was 5 and I know he used to scold me for fiddling with his AWESOME owl clock with bakelite eyes that told the time... kinda creepy though when it's 9:25... so I know owls are kinda trendy right now, so why not join in, cuz I love to be trendy!!! and make a cute little owl doll for my girlfriend's daughter's birthday! And lucky you are the benefactors of this labor of love as well... So if sewing isn't your thing feel free to skip on down to another post, or maybe you'll see how incredibly easy this is and you'll want to learn and start making some of your very own crafty creations!

Here we go!

You will need:

hoaky owl drawing for pseudo pattern (done on 8x11 paper)
4 -8x11 pieces of felt
2 coordinating pieces of fabric, or not if you're feeling kinda crazy!
Some frilly ribbon or lace
fiber-fill or batting

Get the two colors of felt that you want for the front and back and begin to cut out the pieces of your owl using your pattern. Feel free to cut a little extra room for your seam-allowance and don't feel like it has to be perfect, just go for the general shape...

Now take your pattern and cut out the wings. As you can see here, I wanted mine a little bigger than what I had drawn so I cut the wings a bit bigger

Now pin your patterns wings to your fabric of choice and cut around. Then get your coordinating fabric and cut out the piece that you'll use for the chest feathers...

Note: cut the chest feathers part bigger on the sides so that it can sit underneath the wings and get sewn down when you get to that part (see below)

Now get the scraps from the color you used on the back side of your owl and pin the top of your chest feather pattern and cut the arch at the top then scallop the bottom edge (see below,) remembering to keep it a bit wider than what will show, so that you will catch it when you sew your wings down.
Then cut your coordinating piece of frilly ribbon or lace... then lather, rinse, repeat... Ok skip the later and the rinse, but repeat until you have 4 rows of scalloped felt and frilly ribbon...

After you have that all layed out, it's time to give her some really cute big eyes... I really liked how big round perfect circles looked, so I used the bottom of my cup to make an imprint to see if that was big enough for me then I traced that size onto a piece of paper

So I did the same as before, I pinned my pattern to my white felt and cut out my circle, then I did the same with the black then later went back and cut the black slightly smaller than the white... I did the same with the nose... I started out here with two small triangles for the eye sparkle, but decided that I like another set of circles instead in the end.

Now it's time to sew!!!

Deconstruct your owl and set your pieces all aside...
We'll begin with the chest feather pieces and the fabric that sits underneath.
Pin your fabric to your owl and sew it down, then begin to sew your scalloped felt at the top followed by your frilly ribbon...

leaving a bit of space so that your fabric shows thru a little bit...

Now pin your wings onto your owl, and begin to sew them down
Note: when you pin the wings it's most important that the wings cover the sides of the chest feathers

I started to go around just once, but then I thought hmmmm if I keep going it's gonna look even more feathery... so I just sewed around and around and around following the pattern of the wing

Now it's time to change your thread out, as you sew your eyes down you'll want white to match... Sew down the first part of your eyes... the whites and if you're really lazy like me and hate changing out the thread more times than absolutely necessary, proceed to sew down the eye sparkle before the blacks of the eyes...

Time to change out the thread to black and sew down the blacks of your owlys eyes...

Then one more time for her little nose... (Note: I cheated here, since I didn't have orange felt, I used white and an orange sharpie!!, I'm so ghetto!)

Now I did a little flower detail on the back of the owl, which it totally optional and since I have 10 million photos on here already, use your imagination and maybe I'll show you one at the end if you just have to know! If you do put a detail on the back, make sure that you have the "right" side out so that when you sew your doll together your sides match!

Now it's time to sew our little owl together! This is very simple... put the "right" sides or the sides that you want to show together, so that they're not showing and proceed to sew leaving a small gap at the bottom to turn right side out and for stuffing... When you have finished sewing her together trim any excess felt off of the edges...

Now turn your little gal "right" side out

and introduce her to her new best friend mr. stuffy stuff... and you guessed it stuff her tight!

(Note: her nose is missing here because I was going to use a cute vintage button, but didn't end up liking how it looked, your nose should be attached at this point)
After you have gotten her as full as you possibly can, paying close attention to her little ears, and getting out all dents and puckers, sew together your hole using a needle and thread...

Guess what! You did it!

Or if you're crazy like me, you can keep going... what can I say, I love details!

Sooooo I gave her a cute barrette, by cutting out 2 contrasting colors of felt into the shape of a flower, then sewing on a button with thread detail around it with two loops of grosgrain ribbon on the back... I just simply attached it to her little head with my needle and thread...

Lastly to make it special and make sure your lucky recipient will always remember you, I embroidered "To: Friend... Love: Emmy..." my little girl, who contributed by saying "oooohh cool!"

Well I hope you've had as much fun as I have had and I hope if you make one, you'll show me how yours turned out!

Isn't it cool to make something handmade to give to someone special! It used to be that store bought was special, but now it's so much more rare to get that special handmade treat!

Have fun!"


Feel free to visit Cyndi's blog to look around and leave her some comment love.

Friday, August 21, 2009

Placemats...and guest blogger Jill!

I'm so excited for you guys to meet my friend and very first guest blogger...Jill!

Jill is Super Mom.

She does things that I only dream of.

Her and her hubby have chickens
and a vegetable garden.
They go camping and hiking
with their toddlers.
She makes all her own bread
among other things.

Jill is also the person who convinced me to start sewing.
She sent me a pattern to make Mackenzie a bib because she was always spitting up.
From the first stitch of that bib I was hooked.

Jill encourages me to be a better wife, mommy and homemaker.
I know you guys are going to love her as much as I do.

Jill made these super cute place mats for her daughter Elizah.
I love the idea and thought you might too.

Here's Jill...
We bought Elizah a little kitchen table so she could eat at and do art or paint or whatever. Little did I know that she would want to eat all her meals at the little table and not care to eat with us any longer. Hmmm....I'll have to think of something. I made these place mats so she could set her place herself and at the same time learn where the various items are placed on the table. This has been a huge help. She now has a bottom shelf of the pantry where all of "her" dishes are kept so she can get them and just set it herself. I got the idea after reading an article about Montessori (my sister-in-law is really into it). The idea that kids can do a lot more than we give them credit for and thus should be taught to be independent in what they can do. It's way more complex than that but I guess that's the idea behind the place mat creation. She also has a little pitcher filled with water so she no longer has to ask me twenty times a day for water. She can just get herself a cup from her shelf and open the fridge and pour herself a cup of water. She loves the independence and thrill of doing it herself. The fabric I used is from Moda Fabrics.I love most of their prints.

Feel free to visit Jill's blog The Art of Provision and leave her some comment love. She has taken quite the vacation from her blog but promises to be back soon :)